
Welcome to Traditional Tuesday with The Cherry On Top.
I've got a step by step tutorial for you, today. Friday I gave away this free, digital template on the blog and Saturday, I gave away the free example showing how you can use the template digitally. Today, I've got the same template and used it traditionally.
Check out the step by, see what you missed Friday and Saturday and I've got some other scrapbooking goodies that might make your crafting faster and easier, too.

free card making template in action, traditionally
Here's the template I used to make today's card. It's on Friday's blog and it is a digital template.
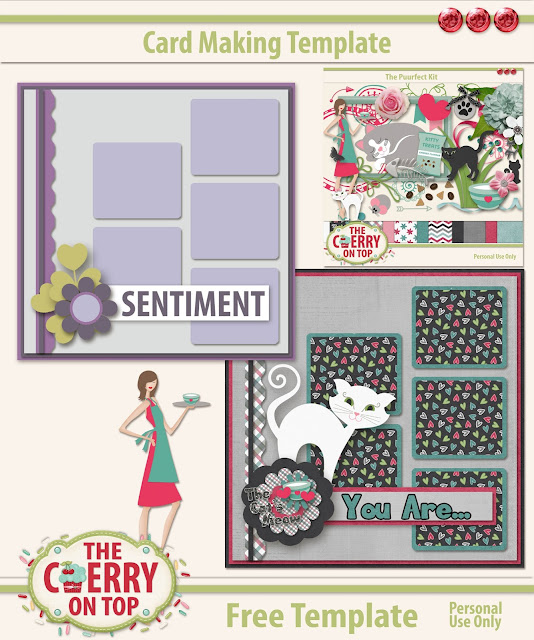
Once you've scrapped up your project digitally, it will look like this when you print it.

All you have to do it cut out the squares if you set it up like this in your scrap program and adhere back to back or adhere on to some rigid card stock if you prefer or if you didn't print on rigid paper. Easy right? Especially, if you don't have a lot of time to scrap traditionally or if you don't have just the right traditional scrapbooking materials.

quick and easy

really cute, fast, easy and cheap
I've also got some free printable word bits on the blog from a few weeks ago. In one of the traditional scrapbooking Facebook groups I'm in, someone was asking for something like this and I thought I'd share them with you. I've got several sets on the blog. It was asked of me, by a traditional scrapbooker that I make these and I love and use them all of the time. Especially, since I can customise the look, size, font, colour...

I have these set up so it's SO easy to cut. You don't even need a special cutting machine to do it easily, neatly and quickly. I just used my scissors and a basic paper cutter.

Voila! All of my word bits are ready to use! At virtually no cost!

On to our tutorial...How to use our templates to make your own traditional cards. Ahh, the beauty of using layouts and pages as a kind of sketch to customise your very own pages. I do it all of the time and so should you. I have a Pinterest board I go to when I need some inspiration before I head up to my scrap table. I want at least a few ideas of how I might layout the pages I want to work on.
Here's what I'm using. These papers are from one of those cheapy paper tablets I got from a discount store. I don't have any scrapbooking stores where I live, nearby. So I just grab things when I find them if I think they'll work for scrapbooking. Collections really help make beautiful pages and you can scrap a lot faster with them as well because you don't have to go through your entire stash looking for coordinating goodies.

Let's take a look at how I gathered my goodies. The pages came from the same book so that's easy. Even those borders came with the papers, but I didn't end up using them. The ribbons matched beautifully, but I didn't use those either. Hehehe...And the washi matched super, too. Then, the grande finale were these Christmas tags my mother sent. They totally fit and brought glitter, dimension and was an easy element to add. Keep reading to see how I used them.

an inexpensive touch of glam

Here's another tip. I'm still experimenting with adhesive. Like I said, I can't just stroll into a scrapbooking shop or even a paper craft store and buy the best. This is double sided tape from a local discount store. I already ruled out a discount store's double sided tape because it was terrible. I like to keep things very positive here, but ya might want to double think the double sided tape from Boekenvoordeel. Hehehe...This is from Action. I wrote it on the inside so I remember. Some scrappy friends say it's ok.

This is going to be my back page. I want to be able to set this card on a table and want it to look good from all angles. A paper from the tablet, inked around the edges. Then I cut out this journaling from an old Christmas card I received and layered that baby up, inking around the edges and then added the gems in the corner where it was a touch blank and to add some Christmas glam.

I'm showing off the brand because so far, I find them to be superior than the junk at the discount store. The ink is from Tim Holtz and it is FAR better than the cheap stuff. It's over a year old and works like the day I bought it. Tesa is a pretty big brand name for adhesive here and this is one of the first times I'm trying it. So far, so good. I love the duo tip. One tiny and one large. Perfect for paper crafting. I use the Elmer's brand mostly, but have to have it shipped from the States.

I'm mega lazy when it comes to journaling and alphabets and stickers. I've got stamps and tons of alpha stickers, but meh. Hehehe... I go to my bag O' cards and look for just the right wording.


Cut some matching or coordinating papers for the strips. This is a 6x6 square, by the way. I chose to ink my borders as well. Make them the same size width or differing. You could even cut a thinner strip and start layering the borders as well.
Here are the shapes resembling my template. You can see that it really isn't such a perfect square shape because my squares are a touch too small for the size of my corner punch. You don't have to corner your squares if you don't want to. Check your corner punch if you don't want shapes like this. I inked around the edges for all of the layers.

Let's move on to those tags and how I used them.

Have you ever sanded around your edges? It adds texture and an aged look. If you do all of the layers this way, you'll have cohesion, too. I just use an old nail file to soften my paper and then ink around with gentle, short strokes and use my finger tips to blend. The green colour on my lettering here, was not matching so I filed most of the colour away and inked lightly over it as well.

I showed off this tip before in a previous blog. I have these largish flourishes in a few different colours and most of the time, they are too big. No worries, though. There is a perfect spot for separation. I use my very sharp, fussy cutting scissors and carefully make the cut. Now, I have TWO smaller flourishes that fit perfectly.

Tuck in your flourishes behind the elevated tag. Once again, the adhesive to these are terrible. I couldn't even get the backing off. I used good glue to adhere them to the page. If I'm not sure about the quality of my adhesive, I use the good stuff to make sure. If you can get good adhesive, by all means don't skimp there.

Let's finish up the cluster.

I found a tiny bag full of these coated berries in a local discount shop. I use a small paint brush to wrap the green wire around and shape to my desire. Then I tucked the berries behind Santy as well, leaving the green bits. You could snip them off with a wire cutter if you don't like them. I used a good glue dot to adhere the berries. The Zots brand of adhesive works really, really great. I had to order them and have them shipped from the Sates.

So what did I end up doing? I carefully scored across the top of my cover page or front of the card about a 1/4 of an inch from the top. I used double sided tape on the inside, lined it up perfectly with the back page and pressed gently to adhere the pages together. Very, very easy to do. That's it!

This is what the png shapes look like. See how they can be used traditionally once printed?

This is another example of a traditional scrap, up cycled Christmas card following the template-ish. Hehehe...I chose to weave some of the strips for more added interest.

Here are a few digital versions using the templates.


Shoo! That was a doozy! Hehehe...
Thanks so much for dropping by The Cherry On Top.
Happy crafting!
No comments:
Post a Comment